今天装了一台阿里云上的服务器,打算安装 nginx、php 和 mysql。系统一开始是 debian 8,所以需要先升级一下。

首先进入 /etc/apt/sources.list.d 目录,里面有个阿里云安装源的配置文件,把它内容删除,然后改成:

deb http://mirrors.aliyun.com/debian stretch main contrib non-free
deb-src http://mirrors.aliyun.com/debian stretch main contrib non-free
deb http://mirrors.aliyun.com/debian stretch-updates main contrib non-free
deb-src http://mirrors.aliyun.com/debian stretch-updates main contrib non-free
deb http://mirrors.aliyun.com/debian stretch-backports main non-free contrib
deb-src http://mirrors.aliyun.com/debian stretch-backports main non-free contrib
deb http://mirrors.aliyun.com/debian-security stretch/updates main contrib non-free
deb-src http://mirrors.aliyun.com/debian-security stretch/updates main contrib non-free

接下来执行:

sudo apt update
sudo apt dist-upgrade

然后确认一下,就是漫长的等待了。下载完所有的安装包之后,会有一个升级列表说明,看不看无所谓了,直接输入 q 就可以退出继续了。后面会遇到几处确认,因为是新装的系统,所以没什么顾及,都选 Y 就可以了。

安装完成后,再执行:

sudo apt autoremove --purge

把没有用的包清理掉就可以了。

装逼是必须的

接下来,安装装逼工具 neofetch。

sudo apt install neofetch

安装之后执行一下 neofetch 就可以看到如下装逼画面了:

neofetch
neofetch

vim 是不可少的

接下来安装 vim,不然编辑个配置文件都麻烦。执行下面的命令:

sudo apt install vim-nox vim-addon-manager vim-syntastic vim-youcompleteme vim-fugitive
wget https://mirrors.aliyun.com/debian/pool/main/v/vim-airline-themes/vim-airline-themes_0%2bgit.20170710.5d75d76-1_all.deb
wget https://mirrors.aliyun.com/debian/pool/main/v/vim-airline/vim-airline_0.9-1_all.deb
sudo dpkg -i vim-airline-themes_0+git.20170710.5d75d76-1_all.deb vim-airline_0.9-1_all.deb
vim-addons install youcompleteme
vim-addons

上面装的是 nox 版本(就是没有 X,即非图形界面的版本)的 vim,这个版本跟普通的 vim 包比,多了 python 插件的支持,不然的话,很多插件没法用。

另外因为 airline 目前只在 sid 里面有,在 stretch 里面没有,所以需要单独下载。不过还好这两个包 vim-airlinevim-airline-themes 没有什么依赖,直接从 sid 仓库里使用 wget 下载下来,用 dpkg 安装就可以了。

执行完上面的命令之后,会看到下面的输出:

# Name                     User Status  System Status
airline removed installed
airline-themes removed installed
editexisting removed removed
fugitive removed installed
justify removed removed
matchit removed removed
syntastic removed installed
systemtap removed removed
youcompleteme installed removed

说明 airline, fugitive, syntasicyoucompleteme 这几个插件装好了。

只是装好还不够,还需要配置一下,首先打开 /etc/vim/vimrc 文件。找到:

"syntax on

"set background=dark

这两句,然后把它们前面的 " 去掉,保存,然后再用 vim 打开就能看到彩色文字了。

接下来,把下面这一段保存到 /etc/vim/vimrc.local 文件中。

vimrc.local下载
"Ctrl+C, Ctrl+V, Ctrl+X, Ctrl+A, Ctrl+Y, Ctrl+Z, Ctrl+S 跟 windows 一样
runtime! mswin.vim

let g:airline_powerline_fonts=1
set laststatus=2

let g:airline#extensions#tabline#enabled=1
let g:airline#extensions#tabline#buffer_nr_show=1

let g:airline#extensions#ycm#enabled=1

autocmd! bufwritepost .vimrc source % "vimrc文件修改之后自动加载。 linux。

set completeopt=longest,menu "自动补全配置,让Vim的补全菜单行为与一般IDE一致
set cursorcolumn "突出显示当前列,可用Ctrl+m切换是否显示
set cursorline "突出显示当前行,可用Ctrl+m切换是否显示
set history=3000 "history存储长度
set nu "显示行数
set shiftwidth=4 "换行时行间交错使用4空格
set cindent shiftwidth=4 "自动缩进4空格
set tabstop=4 "让一个tab等于4个空格
set showmatch "显示括号配对情况
set autoread "当文件在外部被改变时,Vim自动更新载入
set noswapfile "关闭交换文件
set showmode "开启模式显示
set cmdheight=1 "命令部分高度为1
set shortmess=atI "启动的时候不显示那个援助索马里儿童的提示
set t_ti= t_te= "退出vim后,内容显示在终端屏幕
set novisualbell "don't beep
set noerrorbells "don't beep

set wildmode=list:longest
set ttyfast


set wildignore=*.swp,*.bak,*.pyc,*.class
set scrolloff=3 "至少有3行在光标所在行上下


set selection=old
set selectmode=mouse,key
set viminfo^=% "Remember info about open buffers on close
set viminfo+=! "保存全局变量
set magic "正则表达式匹配形式

"autocmd InsertEnter * se cul "用浅色高亮当前行
set ruler "显示标尺
set showcmd "输入的命令显示出来,看的清楚些


"设置标记一列的背景颜色和数字一行颜色一致
hi! link SignColumn LineNr
hi! link ShowMarksHLl DiffAdd
hi! link ShowMarksHLu DiffChange

set hlsearch "高亮显示结果
set incsearch "在输入要搜索的文字时,vim会实时匹配


""""""""""""""""""""""""""""""""""""""""""""""""""""""""""""""""""""""""""""""""
" F1 - F4 设置
" F1 废弃这个键,防止调出系统帮助
" F2 行号开关,用于鼠标复制代码用
" F3 换行开关
" F4 粘贴模式paste_mode开关,用于有格式的代码粘贴
""""""""""""""""""""""""""""""""""""""""""""""""""""""""""""""""""""""""""""""""


" I can type :help on my own, thanks. Protect your fat fingers from the evils of <F1>
nnoremap <F1> <Esc>"
nnoremap <F2> :set nonumber! number?<CR>
nnoremap <F3> :set wrap! wrap?<CR>
set pastetoggle=<F4> "when in insert mode, press <F5> to go to
"paste mode, where you can paste mass data
"that won't be autoindented
au InsertLeave * set nopaste

" disbale paste mode when leaving insert mode


"Treat long lines as break lines (useful when moving around in them)
"se swap之后,同物理行上线直接跳
nnoremap k gk
nnoremap gk k
nnoremap j gj
nnoremap gj j
nnoremap <Up> gk
nnoremap <Down> gj

colorscheme torte

" 多语言语法检查
let g:syntastic_error_symbol='✗' "set error or warning signs
let g:syntastic_warning_symbol='⚠'
let g:syntastic_check_on_open=1
let g:syntastic_enable_highlighting=0
let g:syntastic_python_checkers=['pyflakes'] " 使用pyflakes,速度比pylint快
let g:syntastic_javascript_checkers = ['jsl', 'jshint']
let g:syntastic_html_checkers=['tidy', 'jshint']
let g:syntastic_cpp_include_dirs = ['/usr/include/']
let g:syntastic_cpp_remove_include_errors = 1
let g:syntastic_cpp_check_header = 1
let g:syntastic_cpp_compiler = 'clang++'
let g:syntastic_cpp_compiler_options = '-std=c++11 -stdlib=libstdc++'
let g:syntastic_enable_balloons = 1 "whether to show balloons
highlight SyntasticErrorSign guifg=white guibg=black

最后,在自己的目录下创建一个 .vimrc 文件,哪怕是空的也行。如果没有这个文件,你会发现有些配置不会生效。

最后把没用的 vim, vim-tiny 卸载掉就好了。

命令行不爽是不行的

接下来安装几个命令行增强工具:

sudo apt-get install powerline htop thefuck
wget https://github.com/jingweno/ccat/releases/download/v1.1.0/linux-amd64-1.1.0.tar.gz
tar zxvfp linux-amd64-1.1.0.tar.gz
sudo cp linux-amd64-1.1.0/ccat /usr/bin/ccat
sudo chmod +x /usr/bin/ccat

然后配置一下 .bashrc 文件:

.bashrc下载
# ~/.bashrc: executed by bash(1) for non-login shells.
# see /usr/share/doc/bash/examples/startup-files (in the package bash-doc)
# for examples

# If not running interactively, don't do anything
case $- in
*i*) ;;
*) return;;
esac

# don't put duplicate lines or lines starting with space in the history.
# See bash(1) for more options
HISTCONTROL=ignoreboth

# append to the history file, don't overwrite it
shopt -s histappend

# for setting history length see HISTSIZE and HISTFILESIZE in bash(1)
HISTSIZE=1000
HISTFILESIZE=2000

# check the window size after each command and, if necessary,
# update the values of LINES and COLUMNS.
shopt -s checkwinsize

# If set, the pattern "**" used in a pathname expansion context will
# match all files and zero or more directories and subdirectories.
#shopt -s globstar

# make less more friendly for non-text input files, see lesspipe(1)
#[ -x /usr/bin/lesspipe ] && eval "$(SHELL=/bin/sh lesspipe)"

# set variable identifying the chroot you work in (used in the prompt below)
if [ -z "${debian_chroot:-}" ] && [ -r /etc/debian_chroot ]; then
debian_chroot=$(cat /etc/debian_chroot)
fi

# enable color support of ls and also add handy aliases
if [ -x /usr/bin/dircolors ]; then
test -r ~/.dircolors && eval "$(dircolors -b ~/.dircolors)" || eval "$(dircolors -b)"
alias ls='ls --color=auto'
alias dir='dir --color=auto'
alias vdir='vdir --color=auto'

alias grep='grep --color=auto'
alias fgrep='fgrep --color=auto'
alias egrep='egrep --color=auto'
alias cat='ccat --color=always --bg=dark'
alias top='htop'
fi

# colored GCC warnings and errors
export GCC_COLORS='error=01;31:warning=01;35:note=01;36:caret=01;32:locus=01:quote=01'

# some more ls aliases
alias ll='ls -l'
alias la='ls -A'
alias l='ls -CF'
alias cp='cp -i'
alias mv='mv -i'
alias rm='rm -i'
alias fuck='TF_CMD=$(TF_ALIAS=fuck PYTHONIOENCODING=utf-8 TF_SHELL_ALIASES=$(alias) thefuck $(fc -ln -1)) && eval $TF_CMD && history -s $TF_CMD'

# Alias definitions.
# You may want to put all your additions into a separate file like
# ~/.bash_aliases, instead of adding them here directly.
# See /usr/share/doc/bash-doc/examples in the bash-doc package.

if [ -f ~/.bash_aliases ]; then
. ~/.bash_aliases
fi

# enable programmable completion features (you don't need to enable
# this, if it's already enabled in /etc/bash.bashrc and /etc/profile
# sources /etc/bash.bashrc).
if ! shopt -oq posix; then
if [ -f /usr/share/bash-completion/bash_completion ]; then
. /usr/share/bash-completion/bash_completion
elif [ -f /etc/bash_completion ]; then
. /etc/bash_completion
fi
fi

export PATH=/snap/bin:$PATH

export LESS_TERMCAP_mb=$'\E[01;31m'
export LESS_TERMCAP_md=$'\E[01;31m'
export LESS_TERMCAP_me=$'\E[0m'
export LESS_TERMCAP_se=$'\E[0m'
export LESS_TERMCAP_so=$'\E[01;44;33m'
export LESS_TERMCAP_ue=$'\E[0m'
export LESS_TERMCAP_us=$'\E[01;32m'

stty -ixon # Ctrl+S 会停止输出,该命令让停止输出失效。

if [ -f `which powerline-daemon` ]; then
powerline-daemon -q
POWERLINE_BASH_CONTINUATION=1
POWERLINE_BASH_SELECT=1
. /usr/share/powerline/bindings/bash/powerline.sh
fi
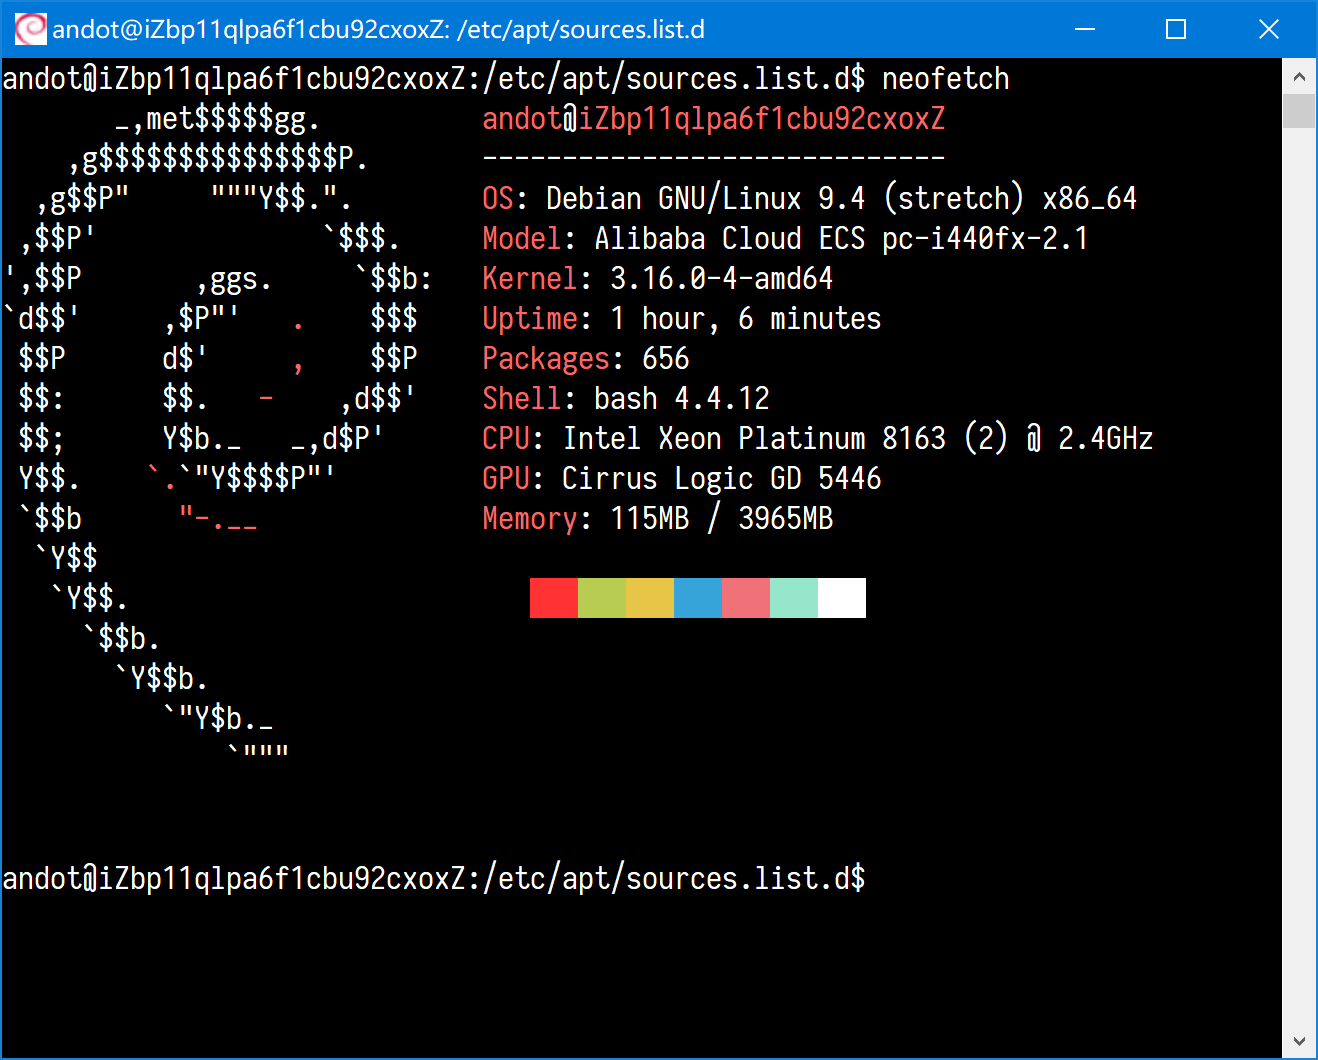
neofetch

然后退出再登录,就可以看到酷炫的命令提示符了。还有彩色的 ls, cat, top, man 等。还可以使用 fuck 命令来纠正输入错误。

开始干正事了

先配置 PHP 最新版本的源。

sudo apt -y install apt-transport-https lsb-release ca-certificates
sudo wget -O /etc/apt/trusted.gpg.d/php.gpg https://packages.sury.org/php/apt.gpg
sudo sh -c 'echo "deb https://packages.sury.org/php/ $(lsb_release -sc) main" > /etc/apt/sources.list.d/php.list'
sudo apt update

再接下来配置 mysql 的源。

wget https://dev.mysql.com/get/mysql-apt-config_0.8.9-1_all.deb
sudo dpkg -i mysql-apt-config_0.8.9-1_all.deb
sudo apt update

再接下来配置 nodejs 最新版本的源。

curl -sL https://deb.nodesource.com/setup_9.x | sudo bash -

最后一步就是安装它们:

sudo apt install -y php7.2 php7.2-fpm php7.2-mysql php7.2-json php7.2-mbstring php7.2-curl php7.2-gd php7.2-bcmath php7.2-opcache php7.2-bz2 php7.2-zip php7.2-dev php-pear nginx mysql-server nodejs

接下来安装 phpmyadmin:

sudo apt install phpmyadmin

安装过程中要选择 Apache 还是 lighttpd,都不选,直接点 OK。然后配置密码就完成了。

然后执行:

sudo ln -s /usr/share/phpmyadmin/ /var/www/

最后配置一下 nginx,再重启 nginx 就可以了。

接下来安装 php 的 hprose 扩展:

sudo pecl update-channels
sudo pecl install hprose

/etc/php/7.2/mods-available 下创建文件 hprose.ini

; configuration for php hprose module
; priority=20
extension=hprose.so

然后执行:

sudo phpenmod hprose
sudo service php7.2-fpm restart

hprose 扩展就装好了。

系统优化

阿里云服务器安装之后,没有交换分区,这样一旦内存用光,系统就会进入假死状态。所以必须要创建一个 swap 文件。不过不需要自己手动创建,直接安装 dphys-swapfile 这个包就可以了。

sudo apt install dphys-swapfile

安装完成后, 运行 free 就可以看到虚拟内存已经启用了。

修改 /etc/sysctl.conf, 在最后加上:

vm.swappiness = 10
net.ipv4.neigh.default.gc_stale_time = 120
net.ipv4.conf.all.rp_filter = 0
net.ipv4.conf.default.rp_filter = 0
net.ipv4.conf.default.arp_announce = 2
net.ipv4.conf.lo.arp_announce = 2
net.ipv4.conf.all.arp_announce = 2
net.ipv4.tcp_max_tw_buckets = 5000
net.ipv4.tcp_syncookies = 1
net.ipv4.tcp_max_syn_backlog = 1024
net.ipv4.tcp_synack_retries = 2
net.ipv6.conf.all.disable_ipv6 = 1
net.ipv6.conf.default.disable_ipv6 = 1
net.ipv6.conf.lo.disable_ipv6 = 1

net.ipv4.tcp_syn_retries = 1
net.ipv4.tcp_synack_retries = 1
net.ipv4.tcp_keepalive_time = 600
net.ipv4.tcp_keepalive_probes = 3
net.ipv4.tcp_keepalive_intvl =15
net.ipv4.tcp_retries2 = 5
net.ipv4.tcp_fin_timeout = 2
net.ipv4.tcp_max_tw_buckets = 36000
net.ipv4.tcp_tw_recycle = 1
net.ipv4.tcp_tw_reuse = 1
net.ipv4.tcp_max_orphans = 131072
net.ipv4.tcp_syncookies = 1
net.ipv4.tcp_max_syn_backlog = 16384
net.ipv4.tcp_wmem = 8192 131072 16777216
net.ipv4.tcp_rmem = 32768 131072 16777216
net.ipv4.tcp_mem = 786432 1048576 1572864
net.ipv4.ip_local_port_range = 1024 65000

net.core.somaxconn = 16384
net.core.netdev_max_backlog = 16384